


OUR PRODUCT
Over 10 years of experience in designing and selling wheel stickers
 Our wheel stickers are the Best Quality in vinyl materials and in colours and they are guaranteed for 7 to 10 years for outdoors usage. They are waterproof and resistant to scratches.
This is what you need to install the stickers: a grease remover to clean the wheel in depth pure alcohol and several microfiber cloths to make sure the wheel is perfectly clean with no particles attached to it; masking tape to mark the wheel. We do recommend to begin the installation on the rear wheel, to get some practice.
USEFUL TIPS
Our stickers have an easy installation, like any other sticker, however, you must take into account that the wheel is a dirty part of the bike and any problem you may have with the installation of the stickers is due to a bad cleaning of the wheel or because you may have touched the adhesive part of the sticker too much. Cleaning the Wheel is the most important part of the installation process, given that a non proper cleaning technique can reduce the adhesiveness of the sticker or even make it non- sticky.
 It is not convenient to touch the adhesive part of the sticker to avoid any contact with oils or sweats.
It is not convenient to touch the adhesive part of the sticker to avoid any contact with oils or sweats.
The adhesiveness of the stickers is designed for smooth surfaces and it is more than enough to last from 7 to 10 years if the cleaning of the wheel prior to the installation of the sticker was realized properly.
In order to ensure a good adhesiveness of the stickers, we do recommend not to install them at low temperatures. If the temperature is low, please, use a hair drier to heat the surface of the wheel and the adhesive side of the sticker before installing the vinyl sticker strips. Once it is installed, we recommend that neither wheel nor sticker suffer from severe temperature changes for the first 24 hours. We also recommend not to wash the bike in 48 to 72 hours from the installation.
The estimated installation time is from 1 to 2 hours. If you do not have a bike elevator which could make the job easier, you will have to install the stickers at floor level and the installation will be more difficult.
INSTALLATION METHODS

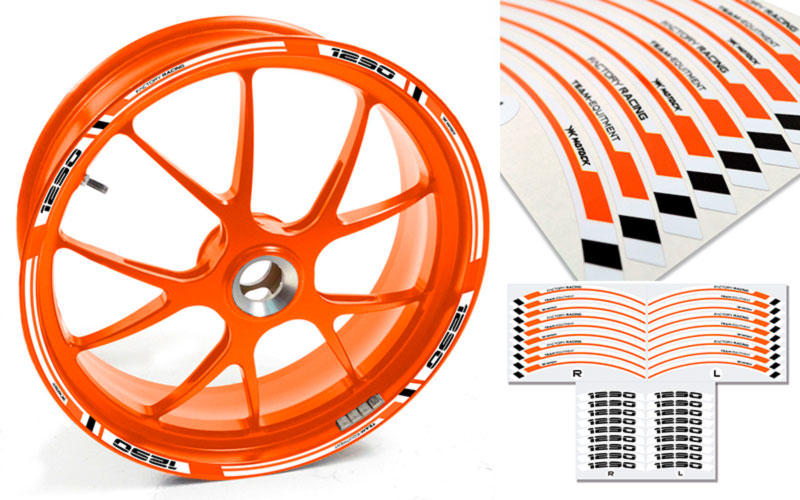
8 Strips for the right +1 extra
8 Strips for the left + 1 extra
8 Logos for the right + 1 extra
8 Logos for the left + 1 extra

Our stickers are prepared to be adapted to 12-21 inches wheels.

Installation types: first type is with the Logo on the left of the strip.

Second type is with the Logo on the right of the strip.

This type of installation is only recommended for strips with symmetrical design and it goes with Logos in both edges.

First step for the installation: divide the wheel into four parts and make 4 marks with masking tape.

Glue the stickers on the right of the marks completing the circle of the wheel.

Take out the masking tape and glue the logo on the left of the strip. Finish the left side of the bike.

Repeat the installation steps for the right side of the bike.